Showing posts with label Gluten Free Recipes. Show all posts

Saturday, December 27, 2014

Beef or Deer Quinoa Stroganoff (gluten free)

INGREDIENTS


  • ¼ cup organic extra virgin olive oil
  • 8 ounce package portabella mushrooms, cleaned, trimmed and quartered
  • 1 pound sirloin or deer steak, sliced across the grain 1 inch thick
  • 1/3 cup dry red wine (or whatever wine you have on hand)
  • 1 tbsp organic unsalted butter
  • 1 small onion, thinly sliced
  • 1 small clove of garlic minced
  • 1 ½ cups organic beef  or chicken stock (see last ingredient...you'll need more to cook quinoa in)
  • 1 tsp. Dijon mustard
  • 1 tbsp. Worcestershire sauce (OPTIONAL...I left out)
  • ¼ cup FAGE 0% Greek Yogurt
  • 1 tbsp. chopped flat leaf parsley
  • Kosher salt to taste
  • Freshly ground black pepper to taste
  • 1 cup of quinoa + 2 cups of organic chicken or beef broth
  • Arrowroot or tapioca starch IF NEEDED.
  • DIRECTIONS

    • In small sauce pan, bring 2 cups of organic broth to boil.  Add 1 cup of rinsed quinoa.  Turn down heat, cover and simmer for 15-20 min, (while you prepare the stroganoff).  


  • In a large skillet (I love using our large cast iron skillet) heat 2 tbsp. of the olive oil until shimmering. Add the mushrooms and cook over medium high heat until softened about 3 minutes, season with salt and pepper and cook one minute longer. Transfer mushrooms to a medium bowl.
  • Season steak with salt and pepper. Heat the remaining 2 tbsp. of oil in the same skillet. Add the steak and spread evenly in pan; cook until browned on all sides (leave center a little pink), about 4 minutes. Transfer the steak to the bowl with the mushrooms. Add the wine to the skillet and stir to scrape up the browned bits from the bottom of the pan; add to the mushrooms and steak.
  • In the same skillet, melt the butter until bubbling. Add the onion and cook until softened about 3 minutes. Season with salt and pepper. Add the garlic and cook one more minute. Add the steak and mushroom mixture back to the pan with the beef stock, Worcestershire sauce and mustard; simmer over medium heat until the pan juices thicken slightly, about 5 minutes.  NOTE: if need to thicken, add a little sprinkle of arrowroot or tapioca starch.  Remove from the heat and stir in the FAGE and parsley. Season the stroganoff with salt and pepper and serve over Quinoa.

  • Yields 4 main course servings

    Wednesday, November 26, 2014

    HOLIDAY Dinners made CLEAN!

    CRANBERRY APPLE-SAUCE:  click HERE for recipe.

    FRESH GREEN BEAN CASSEROLE:  Click HERE for recipe

    SWEET POTATO CASSEROLE (courtesy of thegraciouspantry.com)  Click HERE for recipe.

    PUMPKIN BARS:  click HERE for recipe.

    FALL HARVEST PUMPKIN PIE SPICE BROWNIES:  click HERE for recipe

    GLUTEN FREE CORNBREAD STUFFING: click HERE for recipe

    CLEANED UP TRADER JOES SWEET POTATO PIE:  for recipe click HERE

    PUMPKIN BUTTER:  Click HERE for recipe.

    RAW CHEESECAKE W/ ALMOND COCONUT CRUST:  Click HERE for recipe

    CHOCOLATE CHIP COOKIE DOUGH CHEESECAKE BITES:  Click HERE for recipe

    EASY COCONUT WHIPPED CREAM:  Click HERE for recipe

    HOMEMADE (EASY!) NATURALLY SWEETENED CONDENSED MILK:  Click HERE for recipe

    DELLA'S DELICIOUS APPLE CAKE:  Click HERE for recipe


    Monday, October 13, 2014

    CORNLESS Cornbread

    Someone recently asked me, "Why don't you use corn flour/corn meal?"

    Corn = Inflammation (in most people)

    Corn = GMO (unless you specifically buy non-GMO corn)

    Inflammation + GMO's = a sick person

    I LOVE chili, white, red, anything between...and I LOVE a good cornbread with it.  WARNING:  I like my bread sweet, so cut back on the honey if you don't.

    INGREDIENTS:

    1/2 cup of butter or EVOO (or use a little of both)
    1/2 cup honey or agave
    2 eggs
    1 cup milk or milk alternative + 1 tsp of vinegar or lemon juice (combine and set aside)
    1/2 tsp baking soda
    2 cups NAMASTE Perfect Flour Blend
    1/2 tsp of salt

    DIRECTIONS:

    1.  PREHEAT OVEN 375.  Grease an 8x8 pan.
    2.  If you haven't already done so, combine milk and vinegar/lemon and set aside.  This is our "buttermilk".
    2.  Melt butter.  Stir in honey, mix to incorporate.  Add eggs, mix again.
    3.  Add baking soda to the milk mixture.  Pour into the butter/eggs/honey.
    4.  Stir in flour and salt.  Mix well.  Pour into greased pan.
    5.  Bake 30-40 min or until center is "set".
    6.  Drizzle honey on top once it comes out of oven.

    SERVE W/ YOUR FAVORITE CHILI RECIPE.  Want to know my favorite white chili recipe?  Pioneer Woman's recipe is HERE.  (I use arrowroot powder instead of corn/masa)

    Wednesday, September 24, 2014

    Gluten Free Fried Fish 'N Chips (OR USE CHICKEN INSTEAD!)

    What a GREAT WAY to get in some good healthy fats.  Who knew FRIED FOODS could be GOOD FOR YOU?

    This is one of my families favorite meals...and easy!  I LOVE how this recipe adds some awesome healthy fats through the EVOO and the flax.
    INGREDIENTS:

    4 Frozen Mahi-Mahi or fish of choice (WILD CAUGHT!)...or you can use chicken!
    Organic Brown Rice Flour and/or Whole Spelt Flour
    Ground Flax
    Sea Salt/Pepper
    Organic Milk or Milk Alternative, like almond milk or hemp milk...or you could use eggs.
    Lemon juice or vinegar (ONLY if using milk)
    Organic Potatoes
    EVOO (extra virgin Olive Oil)


    DIRECTIONS:

    CHIPS:

    PREHEAT OVEN TO 375.

    1.  Scrub your potatoes well and rinse off.
    2. Starting at the narrow end, slice potato into round circles.  (yes, leave skin on!)
    3. Place all slices in large bowl.
    4. Drizzle on some EVOO, salt and pepper.  Stir around until all slices are coated.
    5.  Place on a cooling rack and bake 30.  (prepare your meat while they bake)
    6. Change oven to "BROIL" setting and broil another 5 minutes or so until they brown on the top.  Remove and let cool.


    FISH/CHICKEN PREP STEPS:

    1.  Cut your fish or chicken into nugget sized bites...or you could do strips.
    2.  Get a medium sized skillet on the stove and pour in about 1/4 inch of EVOO into the pan.  Turn on medium (around 4).
    3.  Line a large dinner plate w/ a paper towel.

    ASSEMBLY:

    1.  In small bowl pour in 1 cup of milk or milk alternative.  If using eggs, use about 4.  Add 1 tsp of lemon oil to milk.  (omit lemon if using eggs).

    2.  In a large bowl w/ lid or ziplock bag toss in 1 cup of flour.  I use about 3/4 cup of brown rice and 1/4 cup of whole spelt...but feel free to change it up!  I love frying w/ brown rice b/c its a nice light texture.

    3.  Add 2 tsp of sea salt and 1/4 tsp of pepper to flour mix.

    4.  Grab a generous handful of ground flax and toss it in w/ the flour mix.  Give the bag or bowl a good shake to incorporate all ingredients.

    5.  Place raw nuggets in milk/egg and let get totally drenched.  Use a slotted spoon to scoop it out and then place directly into flour mix.  Close up lid/bag and shake until well coated.  If you run out of flour mixture, just whip up some more until all your meat is coated.

    6.  Place meat in hot oil. (you can sprinkle in a little drop of water...if it bubbles, its ready)

    7.  Fry for 2-4 minutes, turn over, fry another 2-4 minutes and then lift out and place on paper towel plate.  (flip/remove when it is a light golden brown)

    8.  Taste 1 bite and see if salty enough.  I like to add a little salt after frying.

    Serve your Fish 'N Chips with some raw carrots and fresh fruit and a side of  20 second HOMEMADE HONEY MUSTARD!

    MAKE EXTRA AND FREEZE.  That way you can take out however many you need and reheat in oven.


    Tuesday, September 2, 2014

    Fall Harvest Pumpkin Spice Brownies

    Ingredients:

    • 1 cup of spelt or GF flour (GF: gluten-free)
    • 2 teaspoons cinnamon
    • 1/4 teaspoon nutmeg
    • 1/4 teaspoon ground cloves
    • 1 teaspoon baking powder
    • 1/2 teaspoon baking soda
    • 1/2 teaspoon salt
    • 2 large eggs
    • 2/3 cup honey or maple syrup (or you could use coconut sugar/sucanat)
    • 1 cup canned pumpkin purree (I like Trader Joes Organic Pumpkin)
    • 2 tbsp fat-free milk (or almond milk)
    • 1/4 cup (1/2 stick) butter, melted (or melted coconut oil)
    • 1 teaspoon vanilla extract
    OPTIONAL ADD-IN'S:  Top with white chocolate chips or mix in some Enjoy Life Soy-Free Chocolate chips for a touch of sweetness.   Drizzle honey on top after baking to add a little extra sweetness.  

    Directions:

    1. Preheat oven to 325F. Line an 8x8 baking pan with parchment paper or spray with nonstick spray. Set aside.
    2. In a large bowl, mix the dry ingredients until fully combined. Set aside. In a small bowl, whisk the eggs, honey/maple, and pumpkin together until combined. Add the milk, melted butter, and vanilla extract. Slowly pour the wet ingredients into the dry ingredients and mix until *just* combined. Do not overmix.
    3. Bake for 25-28 minutes or until a toothpick inserted in the center comes out clean. Allow to cool completely and cut into 12 squares. Bars remain fresh for up to one week stored chilled in an airtight container.
    BE SURE AND VISIT OUR TOXIN-FREE PRODUCTS HERE!

    Tuesday, April 29, 2014

    Pinkalicious Cupcakes...(2 variations: whole wheat or Gluten Free)

    GLUTEN FREE PINKALICIOUS CUPCAKES


    Ingredients:

    1 cup sorghum flour or white rice flour 
    1 cup tapioca starch 
    1 cup organic cane sugar or 3/4 cup honey or agave nectar (for sweeter cupcakes use 1 1/4 cup)
    1/2 teaspoon sea salt 
    1 teaspoon baking powder 
    1 teaspoon baking soda 
    1 teaspoon xanthan gum 
    1 cup vanilla soy, rice, coconut, or almond milk 
    2 organic free-range eggs, beaten or Ener-G egg replacer 
    3 tablespoons coconut oil, melted
    1 tablespoon bourbon vanilla extract 
    1/4 teaspoon lemon juice 

    Instructions:
    Preheat the oven to 350ºF. Line a 12-cupcake tin with paper or parchment liners.
    In a mixing bowl, whisk the flour, starch and dry ingredients together. Add in the non-dairy milk, eggs or egg replacer, coconut oil, vanilla and lemon juice.  Beat with a mixer until the cake batter is smooth. Do not over-beat. 

    Using an ice cream scoop, plop the batter into the twelve liners. Smooth out the tops with wet fingers. 

    Bake in the center of a preheated oven until firm and dome shaped. For me this took about 15-18 minutes at sea level but they may take up to 20 to 22 minutes, depending upon your particular oven and altitude. 

    Cool the pan on a wire rack briefly, then gently pop out the cupcakes and continue cooling on a rack (this avoids steaming the bottoms). 

    Make your icing. 


    Read more: http://glutenfreegoddess.blogspot.com/2009/08/vanilla-cupcakes-with-mocha-icing.html#ixzz2KFR6iL6w

    Saturday, January 11, 2014

    The World's Best Chicken Noodle Soup (Gluten Free, Dairy Free, Soy Free) FREEZE FRIENDLY

    WHEN WE MAKE THIS:  AFTER I ROAST A CHICKEN,  a couple of days later I always make this w/ my leftovers.  For my recipe of roasted chicken, click HERE.  I end up w/ most of the prep work already done for  me.  (cooked potatoes, cooked onions, beautiful run off juices that I can add to stock, and leftover chicken!)


    To make the Worlds Best Chicken Noodle Soup (large batch, freeze leftovers)

    6 cups of homemade broth (click HERE for directions)  If you don't have any homemade ONLY USE ORGANIC chicken or vegetable stock)
    2 tbsp of flour of choice (spelt, buckwheat, whole wheat, unbleached white...whatever you want)
    2 tbsp of EVOO
    large chunks of organic red potatoes
    2 cups (or so) of shredded cooked chicken
    1/2 large onion-cut into chunks
    1 heaping tbsp of diced garlic
    3 tbsp of dried rosemary
    1 bay leaf (optional)
    4 carrots, cut into small sections
    4 celery, sliced
    2 cups cooked BROWN RICE NOODLES.  For this recipe, I buy Tinkyada brand Fusilli.  It is shaped like corkscrews.  Highly recommend.  They taste just like normal noodles, are GF, and whole grain.  I added about  2 cups Uncooked to water and ended up w/ a lot of leftovers which I put in the refrigerator and will use for spaghetti.

    sea salt/ground pepper to taste

    Directions:

    1.  Pour EVOO into stock pot.  Turn heat to medium.  Let oil get hot.
    2.  Toss in chunks of onion and cook for several minutes until browned.  Remove.
    3.  Add flour to EVOO and stir for several minutes.  It will become "goopy" and thick.
    4.  Add STOCK slowly, whisking constantly.  Turn heat up to medium high and continue to whisk until it comes to a light boil.  Turn down heat to simmer.
    4.  Put cooked onion and some of the raw carrots in an emulsion blender.  If you don't have one (I have a magic bullet) then use a regular blender but you'll have to add some of the stock to the bottom)    Blend onions and carrots.  I have to do this in batches b/c my magic bullet is small.  Once blended ADD TO Broth.
    5.  After adding all the emulsified carrots and onion to broth, add GARLIC and potatoes and chicken.
    6.  Add celery and rosemary and bay leaf, salt and pepper.  (you'll have to taste broth to see if more salt/pepper is needed)  Stir well.
    7.  Add cooked noodles...about 2 cups or so.  No right or wrong.
    8.  put a lid on and let it simmer low for a long time...45 minutes or so.  You can do less than that if the potatoes are already cooked.

    Sooo healthy, hearty, yummy!

    **LEFTOVERS:  if you have some left over, we will 1) give it away to neighbors or someone we know who has the flu or 2) freeze it for future dinners.  All you have to do is thaw and reheat.


    Tuesday, November 12, 2013

    GLUTEN FREE CORNBREAD


    Top of cornbread may brown a tad more than picture shown


    INGREDIENTS:

    1 /2 cup of oils of your choice:  any combination of EVOO, Coconut, butter, etc.
    2/3 of sucanat or brown sugar

    2 eggs
    1 cup of buttermilk (don't buy any, just add 1 tsp of lemon juice or vinegar to milk and let sit 5 min)
    1/2 tsp baking soda
    1 cup organic cornmeal
    1 cup GF flour blend
    1/2 tsp salt

    Directions

    1. Preheat oven to 375 degrees F (175 degrees C). Grease an 8 inch square pan.
    2. Melt oils in large bowl or skillet.  Remove from heat and stir in sucanat (or brown sugar). Quickly add eggs and beat until well blended. Combine buttermilk with baking soda and stir into mixture in pan. Stir in cornmeal, flour, and salt until well blended and few lumps remain. Pour batter into the prepared pan.
    3. Bake in the preheated oven for 30 to 40 minutes, or until a toothpick inserted in the center comes out clean.

    Friday, August 9, 2013

    Easiest Lasagna EVER (and Gluten Free!) IF Friendly


    Ingredients 


    1. In a large skillet over medium heat brown the ground beef. Drain the grease. Add spaghetti sauce and simmer for 5 minutes. Set aside.
    2. In a large bowl, mix together the Fage, eggs, dried parsley, salt and ground black pepper.  Feel free to toss in some other herbs, dried or fresh.  A little basil or oregano tastes awesome!
    3. To assemble, in the bottom of a 9x13 inch baking dish evenly spread 3/4 cup of the sauce mixture. Cover with slicked zucchini, 1 3/4 cup of the cheese mixture, mozzarella, and 1/4 cup sauce. Repeat layers twice. Top with zucchini slices and remaining sauce, remaining mozzarella and some Parmesan cheese if you want. Cover with aluminum foil.
    4. Bake in a preheated 350 degree F(175 degrees C) oven for 30 minutes. (it might drip!)  Uncover and bake an additional 10 minutes. Let stand 10 minutes before serving.

    Saturday, June 22, 2013

    BLT Salad W/ Lemony-Mayo Dressing

    Who doesn't love a good BLT in the summer?  I had my first homegrown tomato and I always like to celebrate by fryin' up some bacon and toastin' some bread.  Since going gluten free, I sometimes have to get a little more creative.  This was a GREAT way for me to get my own version of a "BLT"!


    LEMONY-MAYO DRESSING**

    NOTE:  This recipe makes about 1/2 cup.  Double if you want more.

    1 large egg yolk
    1 tbsp of lemon juice
    1/2-1 tsp of dijon mustard (start w/ 1/2 tsp, taste, add more if you want)
    1/4 tsp of sea salt
    1/4 tsp of honey
    1/2 cup of EVOO (extra virgin olive oil)

    In a HEAT PROOF BOWL (glass or metal) whisk 1 egg yolk and lemon juice.  Set the bowl OVER a little pot of boiling water.  DO NOT LET THE BOWL TOUCH THE WATER.  Whisk until the yolk is fluffy and hot, about 20 seconds.  DO NOT ALLOW TO SCRAMBLE.

    Remove from heat and continue to whisk 2-4 minutes to cool down.  Whisk in the mustard, salt, and honey.  Drizzle in the EVOO.  Continue to whisk until shiny and thick.  (not super thick...just "dressing" thick)  Taste and adjust...want a little more spice?  Add more mustard.  Too spicy?  Add more honey.  You get the idea.

    You can cover and refrigerate up to 2 days.

    **This recipe was taken from the Williams Sonoma "Family Meals" cookbook.

    BLT SALAD:

    Uncured bacon (I buy mine at Costco or Trader Joes)
    spinach
    homegrown tomato
    green onion (optional)
    purple onion
    a little colby jack cheese (buy blocked and shred yourself)
    pickles for garnish

    Toss all ingredients into large salad bowl.  Drizzle on lemony-mayo dressing and enjoy!


    Friday, June 21, 2013

    Favorite Summer Drink


    ICE WATER
    ORGANIC LEMON SLICES
    FRESH MINT LEAVES
    A FEW BERRIES AND/OR CHERRIES
    2 PINCHES OF STEVIA POWDER (or more to desired taste)

    Friday, May 31, 2013

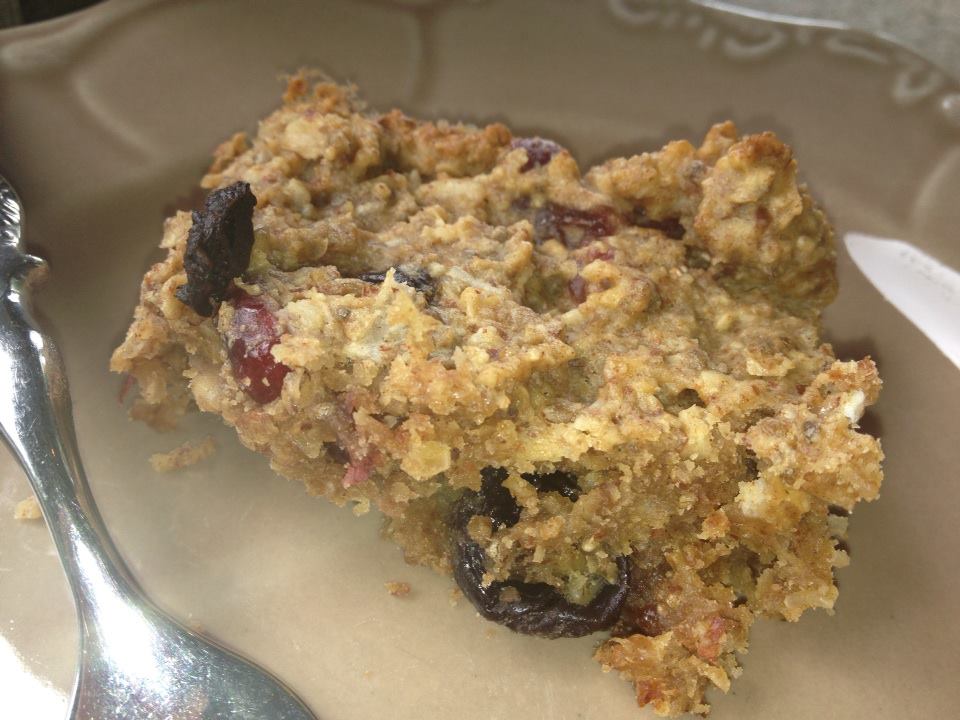
    Rise & Shine BREAKFAST BARS: Gluten free

    My man likes a QUICK breakfast...preferable one he can eat IN HIS CAR.  This is a perfect recipe for people like him.  Don't box yourself in...have fun tossing in your own favorite ingredients...nuts, various dried fruits, seeds...the sky's the limit!  Oh, and can I just add...this is the easiest recipe EVER???  Chewy consistency but no need to use a fork.  Just grab it and go!


    4 cups of rolled-oats (use GF if you are avoiding gluten!)
    2 cups of almond meal (I used Trader Joes brand...you could totally omit and use all oats if you want)
    1 cup (or even a little more) of dried fruit (I used cranberries/cherries but you could use anything)
    2 cups of unsweetened apple juice (I LOVE Costco brand which is NOT from concentrate)
    1/4 cup of sucanat or brown sugar
    1/4-1/2 cup of agave, honey, or maple syrup (start w/ 1/4 cup and then add more if you want it more sweet)
    1 tsp of ground cinnamon
    3/4 tsp sea salt
    1/2 cup of Coconut Oil melted OR EVOO (extra virgin olive oil)
    1/4 cup of almond butter or organic peanut butter

    **OPTIONAL:
    1/2 cup UNSWEETENED coconut flakes
    1/4 cup of chia seeds or ground flax (I used chia)
    1/3 cup of chocolate chips or white chocolate chips
    1/3 cup of sesame seeds or pumpkin seeds


    1.  Heat oven to 375.  Grease a large 9x13 glass pan or line it w/ parchment paper.
    2.  Dump everything in a large bowl and mix.
    3.  Spread evenly in pan w/ a spatula.  Bake 30 minutes.  Allow to cool. (you can let it cool in pan)
    4.  Cut into bars and enjoy!  A GREAT breakfast-on-the-go or mid-day snack.


    Monday, April 29, 2013

    Fried Morels (or Portabella) Mushrooms w/ Gluten Free Option

    Here's the deal:  I. LOVE. FRIED. MUSHROOMS.  Come Morel season, we love to slather on some good tea tree oil (to keep the spring ticks at bay), pull on our boots, and go 'shroom huntin'.  Whether we find none or 100, this is one of my most favorite spring things to do:  fresh air, exploring the spring vegetation, seeing fun wildlife tracks, finding shed deer antlers, etc.  Personally, I feel God's presence when I'm in His creation.  Actually finding morels is the icing on the cake!

    While I usually post extremely healthy recipes, this here is still a good ol' fashioned DEEP FRY method and I love it.  After all, it's once a year so we do it up right 'round these parts!

    **But since I can't help myself, I did choose to use some ground flax, gluten free flours, and a good organic EVOO to fry them in! ;)

    NOTE:  I LIKE TO FRY MY 'SHROOMS ON THE GRILL IN MY CAST IRON.  But you can do it inside, too.

    ANOTHER NOTE:  EVERYTHING TASTES BETTER IN CAST IRON...just sayin'.


    1 gallon (or less) of morels, cut in half (lengthwise) and soaked in salt water/lemon overnight (skip this step if using portabella)
    Oil of your choice
    4 eggs + 4 tbsp of flax + 3/4 cup of water
    1/4 cup of milk or milk alternative
    2 cups of all-purpose, wheat, or GF all-purpose flour blend, or ALMOND MEAL!
    Sea salt/pepper
    *Optional:  misc spices (cajon, paprika, etc)

    DIRECTIONS:

    1.  Toss mushrooms in strainer and rinse with cold water.  (pre-soak overnight in salt/lemon water if using morels)  Set aside.

    2.  Pour enough oil in pan until its about 2-3 inches deep.  Heat on grill or stove.  You'll know it is hot enough when you sprinkle in flour and it sizzles.

    3.  Mix/whisk together the eggs, flax, water and milk in a medium sized bowl.  THIS IS THE WET INGREDIENTS.


    4.  In a large ziplock bag, mix together the flour, salt, pepper, and any added spices.  THIS IS THE DRY INGREDIENTS.

    5.  Make an assembly line:  MUSHROOMS, WET, DRY, COOKIE SHEET.


    6.  Toss mushrooms in WET.  Let "soak up" for about 10 seconds.  Remove and tap on side of bowl.


    7.  Toss wet mushrooms in the ziplock bag full of flour.  Close the bag and shake it vigorously until will coated.  Remove, shake of excess flour, and place on cookie sheet.


    8.  Repeat until all mushrooms are coated.  Toss in hot oil a few at a time and cook until they turn a light gold color.  (5 minutes or so...depends on how hot your oil is)  Remove and place on a paper towel lined plate/bowl.

    SERVE W/ MY HOMEMADE RANCH DRESSING.  Spice it up by adding a little cajun spices or paprika/chili powder.


    Sunday, March 24, 2013

    Cinnabon Cinnamon Roll Cake (Gluten Free Version and Clean Version)

    If you want to make a GLUTEN FREE version of this, you absolutely must use the right LOW PROTEIN blend to make the cake taste light and fluffy.  Here is my favorite CAKE/PASTRY GLUTEN FREE BLEND:

    2 cups white rice flour
    2 cups sweet sourgum flour
    1 1/2 cup of tapioca flour or cornstarch
    1 tbsp of xanghan gum

    Put all ingredients in a ziplock, shake it up, and store in frig.


    CINNAMON ROLL CAKE RECIPE:

    3 cups of white whole wheat flour OR gluten-free cake/pastry blend
    1/4 tsp salt
    1/4 cup of honey
    1/2 cup of sucanat
    4 tsp of baking powder (non-aluminum is best!)
    1 1/2 cup of milk or milk alternative
    2 eggs
    1 tbsp vanilla extract
    1/2 cup of melted coconut oil or EVOO
    2 heaping Tbsp of ground flax (if you have it)

    SWIRL:

    6 tbsp of softened butter
    1/2 cup unsweetened applesauce
    2 Tbsp of almond meal
    1 Tbsp of cinnamon
    1 cup of sucanat OR 1/2-3/4 cup of honey/agave/maple syrup

    GLAZE:

    2 cups of xylitol or organic sugar + 2 tbsp of cornstarch or tapioca flour...BLEND IN FOOD PROCESSOR UNTIL VERY FINE.
    4-5 Tbsp of milk or milk alternative
    1 tsp vanilla

    **NOTE:  the glaze is very sweet and the cake is very sweet.  I do NOT like overly sweet desserts so if I were to make this again I would CUT BACK on the sweetness.  However, my hub's LOVES sweet...so you'll have to just make it and take notes so you know how to adjust next time you make it.


    DIRECTIONS:
    With an electric mixer or stand-up mixer, mix flour, sucanat, honey, salt, baking powder, milk, eggs, vanilla, and flax.  Once combined well, slowly stir in melted coconut oil/Evoo.  Pour into greased 13x9 baking dish.

    SWIRL:

    In medium bowl, mix the softened butter, applesauce, almond meal, cinnamon and sucanat/honey.  Drop evenly over cake batter by the tablespoon and use a knife to swirl/marble through the cake.  Bake at 350 for 25-30 minutes or until knife/toothpick comes out nearly clean from the center.

    GLAZE:

    Whisk until smooth and drizzle over warm cake.


    Friday, March 1, 2013

    Chicken Pot Pie w/ Rosemary Crust (Low Fat/ Optional Gluten Free Crust)

    As many know, I LOVE the Pioneer Woman.  But let's face the facts.  She loves butter, butter and more butter.


    This version of Chicken Pot Pie is a variation of hers but MUCH LESS fat.  Would you believe it if I told you I didn't use ANY butter at ALL except for what is in the crust???  Healthy.  Comfort Food.  Delicious.  Mission Accomplished.

    First make your pie crust.  For my rosemary gluten-free version, click HERE.


    This recipe is ADAPTED from a recipe in my Williams Sonoma "Family Meals" cookbook by Maria Helm Sinskey.  This cookbook is staple and one of my favorites!

    You can CUSTOMIZE the filling to your likes/dislikes.  Just remember, if you take OUT a veggie (like the cup of mushrooms) make sure and REPLACE it w/ another veggie.

    INGREDIENTS:

    1 tbsp of EVOO (or butter)
    1/2 yellow onion, diced
    1 stalk celery, sliced
    2 carrots, sliced
    1 cup mushrooms
    1/4 cup frozen corn
    1/4 frozen peas
    1/4 cup of white wine
    1 cup of chicken stock
    1 tsp of chopped fresh thyme or 1/2 tsp of dried thyme
    1 tbsp plus 1 tsp of all-purpose or gluten free all purpose flour
    2 cups cooked chicken
    Pie crust  (for my rosemary gluten free pie crust click HERE)
    1 large egg beaten w/ 1 tsp of water

    1.  Heat a saucepan over med-high heat and warm the EVOO or butter.  Add the onion and celery and saute until golden, 2-3 minutes.  Add carrots, mushrooms, corn, and peas and saute another 3 minutes.  Pour in the wine, bring it to a simmer, and reduce for about 3 minutes.  Add the stock and thyme and simmer until the veggies are crisp-tender, about 5 minutes.

    2.  In small bowl, whisk together the flour and 1/4 cup of cold water until smooth.  Whisk about 1/4 cup of hot stock from the pan into the flour mixture, and then pour through a fine-mesh sieve back into the pan, stir well, and bring to boil.  Reduce the heat to med-low and simmer until the veggies are just tender, about 5 minutes.  Add the diced chicken, return to a boil, then reduce the head and simmer for minutes to heat the chicken through.

    3.  Remove from heat, let cool, cover and refrigerate for 2 hours.  Can be made up to 2 days in advance.  (the cooling process allows the flavor to meld)

    4.  Preheat oven to 400.  Grease a 9 inch pie pan.  Pour filling into dish, roll out dough and place on top, pinching the sides.  BRUSH THE TOP OF THE CRUST w/ the egg/water mixture.  CUT A FEW VENTS in the top of the crust.  Bake about 45 minutes or until the top is golden brown and it is hot and bubbling.  Let cool 10-15 min before serving.

    "Rolling" out the gluten free rosemary crust


    GF crust...may not win the best-looking award, but it sure does taste good!

    Helping brush egg/water on crust

    "I want a turn!"

    Very very delcious!...and perfect for this snowy weather!

    Gluten Free Pie Crust

    RECIPE TAKEN FROM HERE.

    NOTE:  IT IS VERY VERY IMPORTANT to read "tips for making the perfect crust" before actually doing it.  It helps TREMENDOUSLY!


    Here are my tips for making the perfect gluten free pie crust:

    1. Cold, cold, cold! Get your ingredients cold before using them. Cut up your butter or shortening into small pieces and pop it in the freezer for 15 to 30 minutes before starting your pastry. Put ice cubes in your water for a good 10 minutes before using it to really chill it down.

    2. Use a food processor. The speed with which the food processor can combine the ingredients and cut in your butter or shortening is so much faster than if you do it by hand and results in a flakier crust. Of course if you don’t have a food processor, just cut the shortening or butter in by hand but work quickly and don’t over do it. Bigger pieces of butter or shortening are not only OK, but preferred.

    3. Be skimpy on the water. The biggest mistake most people make in preparing pie crusts (whether it be gluten-free or not) is adding too much water. Add just enough so that the ingredients hold together when squeezed in your hand. Too much water will result in a tough crust.

    4. Give it a rest! Let your pie crust dough rest for at least an hour before rolling. Many people think this is to let the gluten rest, which would make no sense in a gluten-free recipe, but in truth what you are doing is letting the moisture distribute evenly. Never skip the resting period.

    5. Extrude – don’t roll. Gluten-free pie crust is more fragile than regular pie crust as it lacks the sticking power of the gluten. It is much easier to employ the “extrusion method”. Simply place your dough on a piece of wax paper that is dusted lightly with gluten-free flour, then sprinkle a little more flour on the dough and top with another piece of wax paper and roll it out. This will help keep your crust in one piece. Using the wax paper also helps in transferring the dough to the pie plate. If a piece falls off or breaks, just pinch it back together, don’t be afraid to show your pie crust who’s boss.

    6. Use great ingredients. The sum of the parts will only be as good as what you put in it. Start with a good, pastry quality all purpose gluten-free flour blend that is not grainy or cardboard tasting.   For a perfect-just-like-Grandma-used-to-make pie crust you need a flour blend that has a high starch content and some xanthan gum.  You need the crust to be flaky but still stick together.  If you don’t have a brand you like then make your own using either super fine or Asian flours, they are milled much more finely than most. Also use the best quality butter  you can get buy and always use either kosher or fine sea salt.  If you can not have dairy then substitute the butter with all vegetable solid shortening.  In my opinion, the butter flavored shortenings do not produce as good a flavor as the regular, non-flavored.  And actually I think that using Crisco results in the best tasting, dairy free pie crust but if you just can’t get on board with Crisco, I understand.  

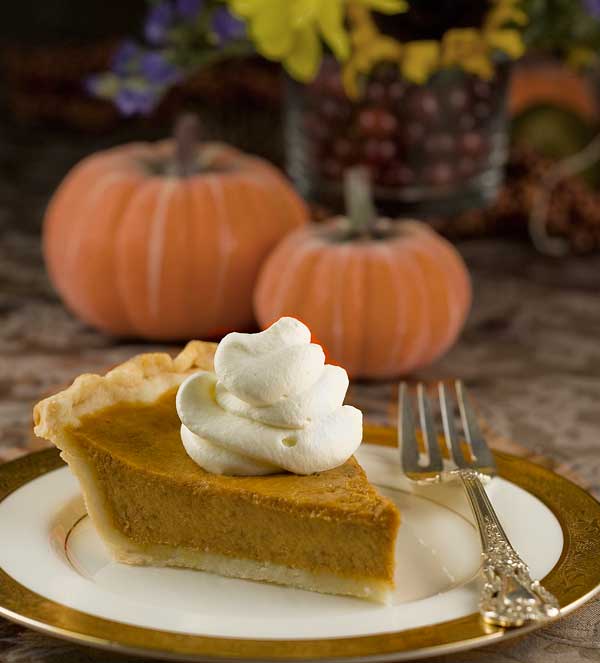
    Gluten Free Recipes Gluten Free Dairy Free Pumpkin Pie

    Gluten Free Perfect Pie Crust Recipe


    Ingredients


    ½ cup unsalted butter or solid, all vegetable non-dairy shortening
    2 to 4 tablespoons cold water
    *1¼ cups All Purpose Gluten Free Flour Blend plus more for rolling
    1/2 teaspoon kosher or fine sea salt
    2 tablespoons sugar **OMIT it making a non-dessert, like chicken pot pie

    MISTY'S NOTE:  If wanting to make a ROSEMARY crust, simply add about 1 tbsp of crushed, dried rosemary.

    * you can make your own homemade version of a flour blend by combining 3/4 cup super fine white rice flour with 1/4 cup potato starch (not potato flour), 1/4 cup sweet rice flour and 1/4 cup tapioca starch (use Asian tapioca to avoid an “off” taste to the tapioca) and 1 teaspoon xanthan gum.  Whisk until fully combined.  This will give you enough for the recipe plus rolling.


    Directions


    Cut butter into ½ inch pieces and place it the freezer for 15 – 30 minutes.

    Add some ice cubes to the water and let it get ice cold while preparing the dry ingredients.
    Combine the flour blend, salt and sugar (if using) in the bowl of a food processor. Pulse 5 -6 times to combine. Add the butter and pulse 6 -8 times or until the mixture resembles coarse meal with some pea size pieces of butter.

    With processor running, add ice water 1 tablespoon at a time until the mixture just barely starts to clump together. If you pinch some of the crumbly dough together and it holds then you have enough water, if not add more a little at a time. You do not want to add any more water than is absolutely necessary.

    Remove the dough from the machine and form into a disk. Wrap the disk in plastic wrap and refrigerate for at least one hour or for as long as 2 -3 days.  Since the dough is so crumbly and does not hold together at this point, I find it easier (and far less messy) to pour the mixture into a large food storage bag and form it into a disk using the bag to help. Then just close up the bag and put it in the fridge. Remove dough from fridge 5 minutes before rolling.

    MISTY'S NOTE:  When you remove from the frig, you will look at the ball and think, "How in the world will this roll out?"  It's hard and crumbly, but trust me...if you are patient it really does work.  It doesn't roll out like normal dough...you have to work w/ it.  I kind of smashed mine (w/ the rolling pin) and then rolled.  I pinched it, I smashed it some more, rolled again, etc until within a few minutes I had a nice round piece of crust.  I removed the top layer of wax paper, carried it over to my pie pan, and gently "flipped" the crust upside down, layed it on top of my filling and then pinched the sides.  It still broke a little and crumbled, but I just pinched it back together.  

    To roll the dough, lay a piece of waxed paper on a work surface and sprinkle with some flour blend. Lay the chilled disk on the floured paper, sprinkle with some more flour and lay on another piece of waxed paper. "Roll" the dough into a circle approximately 12 inches wide. Remove the top sheet of waxed paper and carefully transfer into a 9 inch pie plate and remove the waxed paper. Push the dough very gently down so it lines the bottom and sides of the pie plate. If the dough splits or breaks apart just push it back together.
    - See more at: http://simplygluten-free.com/blog/2011/10/perfect-gluten-free-pie-crust-recipe.html#sthash.X6QNbSji.dpuf

    Friday, February 22, 2013

    Lazy Morning French Toast Mash (GF/DF options)

    I had 2 gluten-free dinner rolls that were hard as a rock but I sure didn't want to toss them out!  So this morning I whipped together a "mash" similar to a french toast bake. There are TONS of delicious french toast casseroles out there, but this one took all of 10 minutes and tasted great to me.


    Next time you have some crusty bread that you are about to throw out, think again and turn it into a delicious breakfast.  You can use any kind of bread.

    Enjoy!

    This is for ONE SERVING:


    2 crusty dinner rolls or any other kind of bread
    1/4-1/2 cup of milk or milk alternative
    1 egg
    1/2-1tsp of vanilla extract.  (I used a full tsp)
    1/2 tsp of cinnamon
    1 tsp of honey
    1 tsp of butter or EVOO  (I used my blood orange EVOO from Heavenly Olive Oils/Vinegars)
    pinch of nutmeg (optional)
    pinch of salt (optional)
    1 heaping tbsp of ground flax

    TOPPINGS:  maple syrup, flavored Balsamic Vinegar, dried cherries, fresh blueberries, pecans, etc.

    1. Whisk all the ingredients MINUS the bread and flax in a small bowl.  (I mixed mine all up in the same pan...what can I say?  That's why this is called LAZY morning mash!)

    2.  Break up the bread into small bite-sized pieces and place in a small skillet.  Pour the milk mixture over the bread.  Allow to sit for about 5 minutes so bread can "soak up" the liquid.  (stir it around every minute or so)


    3.  Turn on stove top to medium heat and cook until the liquid is gone.  It will be very mushy.

    4.  Turn into a bowl and top w/ ground flax, syrup and some extra yummy-ness like dried cherries or fresh blueberries!


    Saturday, February 9, 2013

    Gluten Free Conversion Chart

    Use this simple chart as a 'QUICK LOOK-UP' guide to your favorite recipes.  NOTE:  depending on the recipe, you may need to use different types of flours other than the ones mentioned.  As I've said a million times before, cooking/baking GF means lots of experimenting but this is a good start.


    Tuesday, February 5, 2013

    RAW VEGAN COOKIE DOUGH BITES (Gluten/Dairy Free)

    2 1/2 cups almond meal (feel free to use Gluten Free Oat Flour mixed w/ Almond Meal, too)
    1/2 tsp sea salt
    1/2 cup EVOO or Coconut Oil (I use a mix of both)
    1 tbsp vanilla extract
    1/4-1/2 cup of agave nectar, maple syrup, (or raw honey) (start w/ 1/4 cup, taste dough and add more until you reach preferred sweetness.  I usually end up using about 1/4 cup plus 1-2 tbsp)
    1 cup dark chocolate chips OR dried cherries
    1/4 cup of raw chia or ground flax
    *Optional: unsweetened coconut flakes

    Combine dry ingredients.  Stir wet ingredients together in separate bowl and then add to dry.  Form balls and chill...or just put in an air tight container and form balls when ready to serve.

    These are delicious and my kids can't get enough!  Love all the raw goodness they are getting when they snack on these!


    Tuesday, January 22, 2013

    Chocolate Chip Cookies (Dairy/Gluten Free)


    Lots of people think that just because you eat gluten/dairy free you can't have some of your favorite foods.  This recipe proves them all wrong!  This recipe was taken from http://www.elanaspantry.com/dairy-free-gluten-free-chocolate-chip-cookies/

    Chocolate Chip Cookies (Dairy Free/Gluten Free)

    1. Combine dry ingredients in a large bowl
    2. Stir together wet ingredients in a smaller bowl
    3. Mix wet ingredients into dry
    4. Form ½ 1-inch balls and press onto a parchment paper lined baking sheet
    5. Bake at 350° for 7-10 minutes
    6. Cool and serve
    Makes 20-24 cookies
    * Please note: Bob’s Red Mill almond flour does not yield successful results when used in this recipe. For more information regarding this matter please see my FAQs.